As an Amazon Associate, we earn from qualifying purchases. Some links on this site are affiliate links at no extra cost to you. Our recommendations are based on thorough research and editorial judgment.

How Pedalboard Layout Affects Tone and Workflow
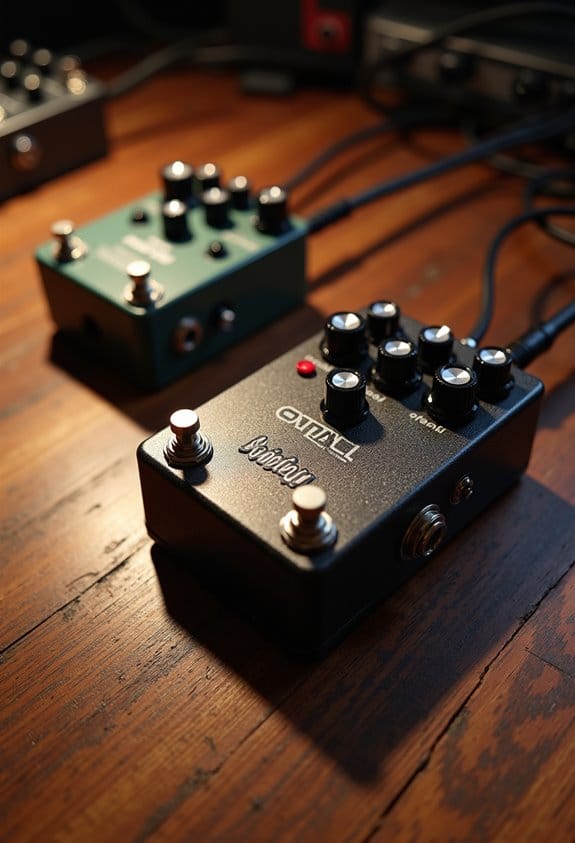
Our pedalboard layout is essential for both tone and workflow. By starting with a tuner, we guarantee a clean signal, while positioning dynamic effects like compressors next helps clarify our sound. Distortion pedals shape our core tone and should be ordered from light to heavy. Finally, placing time-based effects, like delay and reverb, at the end preserves clarity. This thoughtful arrangement not only enhances our sound but also streamlines our performance. There’s so much more to uncover!
Key Takeaways
- A well-arranged pedal layout preserves tone clarity by ensuring the signal chain flows logically from tuner to effects like reverb and delay.
- Positioning dynamics pedals after the tuner enhances clarity, while distortion pedals shape the core tone, influencing the overall sound character.
- Time-based effects placed at the end enhance richness without muddiness, allowing for clearer, more defined sound in performances.
- Quality patch cables and proper power supplies minimize noise and maximize signal integrity, which is vital for maintaining clean tone throughout the setup.
- Regular maintenance and thoughtful organization of pedals streamline workflow, allowing for quick adjustments during performances without compromising sound quality.
Understanding the Importance of Pedalboard Layout
You may be interested


Hey! Have you ever thought about how a pedalboard layout can totally transform your sound? The way you arrange your pedals plays a crucial role in shaping your tone. For instance, putting your tuner at the beginning ensures you’re always in tune, which is key for any performance. After that, if you position dynamic effects, like compressors or pitch shifters, right after the tuner, you keep the clarity in your signal.
Now, let’s talk about time-based effects like delay and reverb. It’s a good idea to place those at the end of your signal chain. This helps avoid a muddy sound that can happen when too many effects overlap each other. Plus, when you put your go-to pedals within easy reach, you can make quick adjustments while you play, keeping the music alive and flowing.
Also, integrating true bypass pedals in your layout helps maintain signal integrity and keeps your overall tone clean.
How Signal Chain Order Influences Tone Quality?

When it comes to shaping your tone, the order of your pedal chain is super important. Think of it like a recipe—each ingredient plays a role in the final dish. For example, if you place your tuner first, you ensure that your signal is clean and precise, which is crucial for good sound. After that, consider adding a compressor; it balances the dynamics of your playing and brings clarity to your sound.
Next, you want to position any gain pedals like overdrive or distortion early in the chain. This works well because they lay down your core tone. Once that’s set, you can introduce modulation effects, like chorus or flanger, which add depth but won’t muddy your sound. Finally, place time-based effects like delays and reverbs at the end of the chain. This keeps your sound clear and rich, making it spacious without losing detail.
To further enhance and control your tone, consider the use of amplifiers with built-in effects, which can reduce the need for additional pedals and streamline your signal chain.
Essential Pedal Categories and Their Optimal Placement
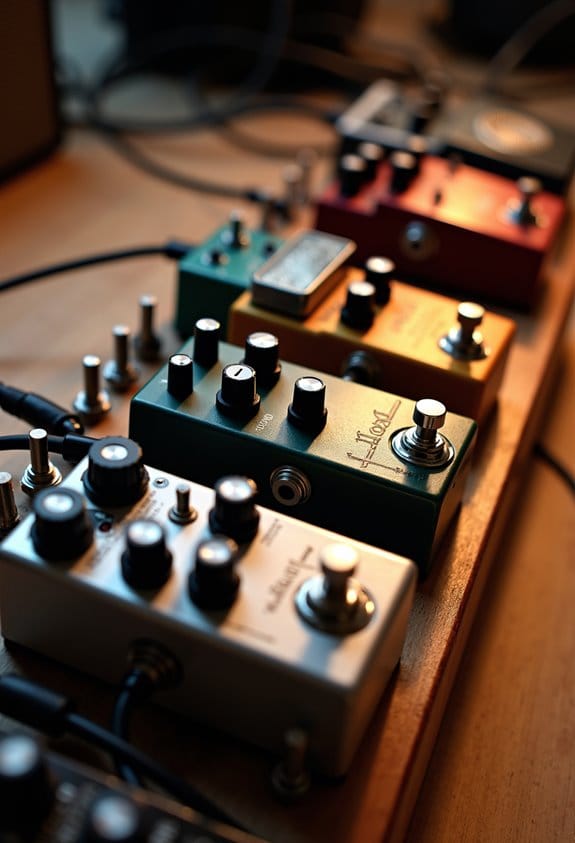
Hey there! Let’s chat about setting up your pedalboard for the best sound. The way you arrange your essential pedals really matters! Start with your tuner at the very beginning of your signal chain. This is super important because it ensures you’re always in tune and keeps your signal nice and clean.
Next up, put your dynamics pedals, like compressors, right after the tuner. They work best when they get that unaltered sound. For example, if you’re using a compressor, it’ll help smooth out your volume levels and make your playing more consistent. After that, it’s time for your distortion pedals—they really shape your core tone. If you have a lighter overdrive, put that before a heavier fuzz pedal. This way, you can build your sound step by step.
Once you have your distortion set, let’s move on to modulation pedals like chorus and flanger. These guys can add some really interesting textures to your sound. Finally, at the end of your signal chain, you’ll want your delay and reverb effects, with the reverb as the last thing. This helps prevent your sound from getting muddy and creates those lush, spacious effects we all love. Be sure to use pedals with true bypass functionality in your distortion section to maintain signal clarity throughout your setup.
Understanding Effects Loops for Clearer Tone
Hey, have you ever thought about effects loops? They can really amp up your tone and sound quality. You’ll find these loops in many amplifiers, and they let you add effects like delay and reverb after the preamp stage. Why does that matter? Well, it allows for a cleaner signal. For instance, if you use a delay pedal through the effects loop, you’ll notice those repeats come out sharper and more defined, rather than muddied by distortion.
When you put reverb in the effects loop, it preserves your amp’s natural sound too. This means you get that spacious effect without losing clarity. You want to be mindful, though—stick to effects meant for line-level signals to keep your tone intact. A good tip here is to look into using a buffered bypass; it really helps maintain that sound clarity. Additionally, using a true bypass compressor in your effects chain can further preserve your natural guitar tone when the pedal is off.
Finding the Right Balance Between Creativity and Practical Pedal Setup
You know, balancing creativity with a practical pedal setup can feel like threading a needle sometimes, but it’s super important for getting the best sounds from your music. A good pedalboard layout not only keeps your signal strong but also allows you to experiment with unique sounds without worrying about interference. For instance, if you put your distortion pedal at the front, you can shape your tone right from the start, while keeping your delay or reverb pedals towards the end can really enhance your sound’s depth.
One tip I love is to keep your most-used pedals within easy reach, especially for live performances. It not only improves your workflow but also makes it more intuitive. Plus, taking care of your cables helps avoid chaos onstage, so you can focus on the music instead of wrestling with your setup. When you find that sweet spot between creativity and practicality, you can truly turn your ideas into something magical! Speaking of which, let’s talk about how to choose the right pedals for your sound. Loopers with multiple memory slots can be a game-changer for creating dynamic and layered performances.
Choosing the Right Power Supply for Your Pedalboard
Hey there! If you want your pedalboard to sound as amazing as possible, have you ever thought about the power supply? Picking the right power supply is super important for reducing noise and keeping the voltage stable. Trust me, using a dedicated power supply is the way to go instead of relying on a daisy chain. For example, the Strymon Zuma is a fantastic choice because it offers isolated outputs, which means each pedal gets clean power, resulting in a better overall sound.
Before you plug anything in, don’t forget to double-check the voltage and polarity compatibility to avoid any mishaps. Getting that wrong can really damage your pedals, and nobody wants that! Plus, think about how you’ll position your power supply on your board. Keeping everything organized not only looks nice but helps with functionality too.
As you grow your pedal collection, it’s a good idea to constantly assess your power supply’s performance. This way, you can ensure everything runs smoothly as you add new sounds to your setup. What other aspects of your pedalboard are you curious about? Additionally, choosing a power supply with independent short-circuit protection can safeguard your pedals and avoid setup failures.
Maximizing Volume and Expression Pedals for Enhanced Tone
Hey! Let’s talk about how you can really amp up your sound with volume and expression pedals. Positioning your volume pedal at the start of your signal chain is a smart move. It gives you better control right from the get-go, ensuring your guitar signal stays clear before any of the effects kick in. For example, if you place the pedal first, you’ll hear a clean tone that can really shine through.
Now, if you decide to put the volume pedal after your distortion, it can work wonders, too! It helps to clean up any muddiness while allowing you to express yourself dynamically. Think about how you can play with the volume during a solo to create swells and dips that really draw in your audience.
And don’t forget about dedicated expression pedals! These can help you tweak parameters like modulation or delay on the fly, which adds a whole new layer of depth to your performance. Just imagine adjusting the speed of a tremolo effect while playing—how cool is that?
To keep your tone intact while boosting volume, consider using boost pedals with true bypass, which allow increased gain without tone coloration or signal loss.
How Cable Quality Affects Your Sound and Performance
Hey there! You might not think about it much, but the quality of your cables can really make a difference in your sound and performance. When you use high-quality patch cables, like those from Mogami or Neutrik, you’re actually cutting down on noise and keeping your signal clear. This means your guitar tone comes through beautifully instead of getting muddled up.
Think about it this way: if you’re using cheap cables, they can introduce annoying hum or interference, especially when you have a bunch of pedals lined up on your board. Have you ever experienced that frustrating buzz when you step on certain pedals? Custom-made cables can really help here—they’re tailored just for your setup and help to minimize signal loss, especially if you have longer runs.
Also, paying attention to cable length is super important. If you go for an unnecessarily long cable, you might notice that your high frequencies don’t sound as bright anymore. Plus, keeping your cables organized not only makes your setup look nicer but also enhances reliability during performances. Using cables with oxygen-free copper conductors ensures your tone clarity is preserved across your entire pedalboard.
Experimenting With Advanced Effects: Tips for Musicians
Hey there! Let’s chat about how advanced effects can totally reshape our sound. You know those modulation and time-based pedals? They can really spice up our music by adding depth and texture. For example, if you throw a chorus pedal in before your delay, you’ll create these super lush soundscapes that just pop!
Now, when it comes to clarity, using a dedicated effects loop for things like delays and reverbs is key. It keeps those effects clear so they don’t muddy up your distortion. Think of it like this: your guitar tone is the meal, and your effects are the seasoning—use them well, and everything blends nicely.
Also, don’t shy away from experimenting with your pedal order. Try rearranging them every now and then; you might stumble upon a really cool sound. And if you have an expression pedal, using it to control parameters live can bring an extra layer of expression to your playing. It’s all about having fun and discovering what resonates with you—it’s an exciting journey! What do you think; ready to give those effects a spin?
Additionally, incorporating true bypass pedals can help preserve your original tone when effects are turned off, ensuring your sound stays crisp and uncolored.
Addressing Common Pedalboard Setup Issues
Hey! Let’s talk about pedalboards and how we can tackle some common setup issues. Getting the right size pedalboard is super important; it should fit all your pedals comfortably without feeling cramped. This way, you’ll avoid any signal loss and keep your tone sounding crisp. For example, if you’re using a smaller board, you might have to be a bit picky about which pedals to include.
Now, here’s a tip: always put your gain pedals early in the chain. This ensures you catch that sweet tone right from the start. Meanwhile, time-based effects like delay and reverb should go at the end to keep everything clear. Also, make it easy on yourself by positioning your most-used pedals within arm’s reach. This little tweak can really streamline your performance flow.
Don’t forget about long cable runs, especially if your setup is extensive. Using buffer pedals can be a lifesaver here; they help maintain your tone over those long stretches of cable. And it’s good practice to regularly check and tweak your layout; you might just discover a setup that lets you perform even better. Speaking of which, let’s move on to some creative ways to enhance your sound even further!
Additionally, maintaining your gear properly is crucial, just like how regular maintenance of nut slotting files ensures optimal instrument performance.
Frequently Asked Questions
How Does Pedalboard Layout Affect My Live Performance Efficiency?
Our pedalboard layout directly influences our live performance efficiency. By optimizing pedal order and setup strategies within our signal chain, we enhance stage presence and reduce performance anxiety, leading to a smoother, more engaging show.
Can I Use a Pedalboard With Wireless Systems?
Yes, we can definitely use a pedalboard with wireless systems. It’s crucial to confirm wireless compatibility, consider battery options, maintain signal integrity, choose appropriate pedal size, and stay within the specified frequency range for peak performance.
What Is the Best Way to Organize My Pedalboard on a Budget?
We can organize our pedalboard on a budget by exploring affordable options like used pedals, utilizing DIY solutions for custom layouts, and incorporating pedalboard accessories that enhance functionality while keeping costs down.
How Do I Prevent Unwanted Noise in My Pedal Setup?
Did you know up to 80% of pedal noise comes from poor setup? We can prevent unwanted noise by using signal grounding techniques, pedal isolation methods, noise suppression pedals, and better cable management with reliable power supply choices.
Are There Specific Materials for Pedalboard That Enhance Sound Quality?
Yes, using wood materials can enhance warmth, while a metal base provides sturdiness. Foam padding dampens unwanted vibrations, and careful cable choice and effects placement also contribute greatly to sound quality. Let’s explore these options together!


